| ABOUT | NEWS | THE TEAM | RESIDENCIES | TECHNOLOGIES | RESEARCH | CONTACT |
| First published on www.designwalesforum.org |
| date: 16th March 2015 |
| author: Diana Oliveira |
I've 3D Printed
a Pinhole Camera
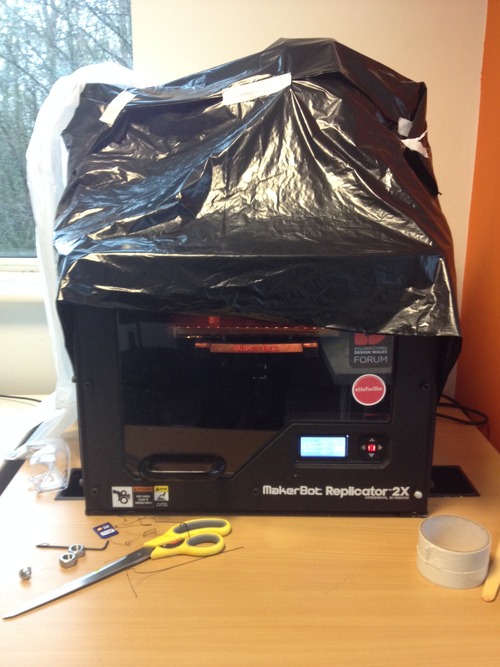
Here at Design Wales we've been enjoying experimenting with 3D printing for a while. First through Makers Using Technology and now... pretty much whenever we find the time! I asked myself what I would print on a Makerbot Replicator 2x and started browsing Thingiverse for inspiration. As a photographer I thought maybe I should print something that would be useful to me like a lens cap holder or an extension tube for taking macro photos… It all seemed pretty standard and kind of boring when I found ready-to-print pinhole cameras! The idea is that you print a number of different parts that put together make the camera. This seemed like a more exciting project to me so I picked the one I thought would probably work best and had a ‘no nonsense’ design. I also didn’t want to use medium or large format film in case it didn’t work very well (as it’s more expensive than 35mm) so I kept it simple with this choice.
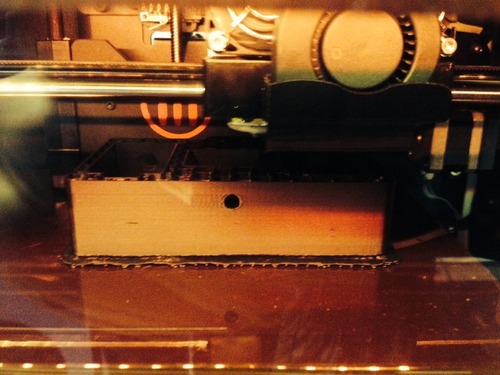
One of the things I had already learned through watching other people use 3D printers is that it’s never straight forward. One does not simply 3D print something! There are always complications and for me it was that when printing the back lid and the main body. It would curl and lift away from the platform in the printer. After Googling the problem I tried covering the printer with a bin bag, which may sound odd. The bin bag did a great job at keeping the heat inside the printer and kept the middle layers of the print at a good temperature. This stopped them from shrinking and lifting the print away from the platform.
I wanted it to look a bit more exciting than the one on Thingiverse so I chose to print different parts in different colours. Though I had to keep the main body in black to prevent any light leak on the film. I also lined the inside of the blue lid with black velour for the same reason.
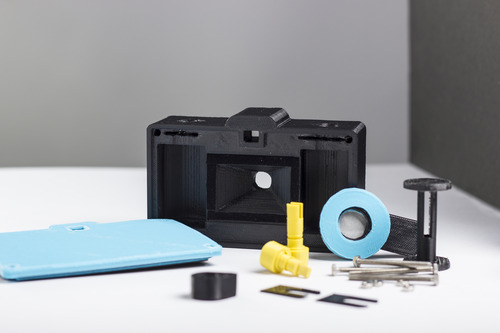
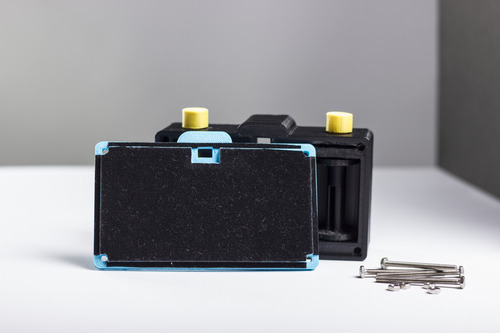
The camera is held together by M3 40mm screws and nuts (the instructions in Thingiverse say M4 40mm but it wouldn’t fit). This may not be the most practical system for a camera, but I guess it just means I have to be extra careful every time I need to open the camera so I don’t lose the tiny nuts.
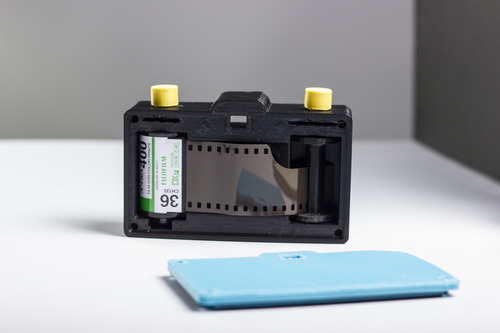

I cut a bit of the thick tin foil from a tea light for the lens and made a hole with a pin. Normally you use ordinary kitchen tin foil for this, but I wanted a more sturdy material.
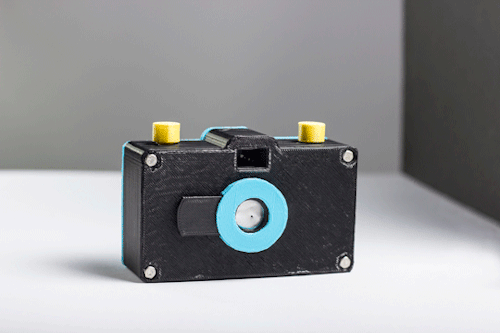
I thought of improving the details by filing and painting the different surfaces, but then I would be hiding all the rough and quirky qualities of 3D printing. So I just kept it as it is. It was never my intension to make an ordinary looking camera that just happens to have been 3D printed. To me 3D printing is a medium with its own qualities and if you choose to 3D print something - especially on a Makerbot or similar - you must accept its unique qualities. Pinhole cameras are known for being easy DIY cameras that are fun to experiment with. This 3D printed camera is no different! Someone made the digital files and I then made the prints - it’s digitally handmade, but handmade none the less.
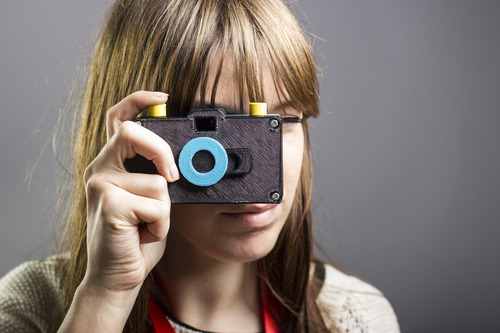
The only thing left to do now it is to take some photos! Stay tuned for the results…
Photos by Diana Oliveira Photography